- Linkwell, Link our world Well!
- marketing01@mylinkwell.com

Interpreting the 7 Features of Preconnected Cable Applications
2023-11-10
How to decide between WiFi 6 and WiFi 5 for your wireless needs?
2023-11-17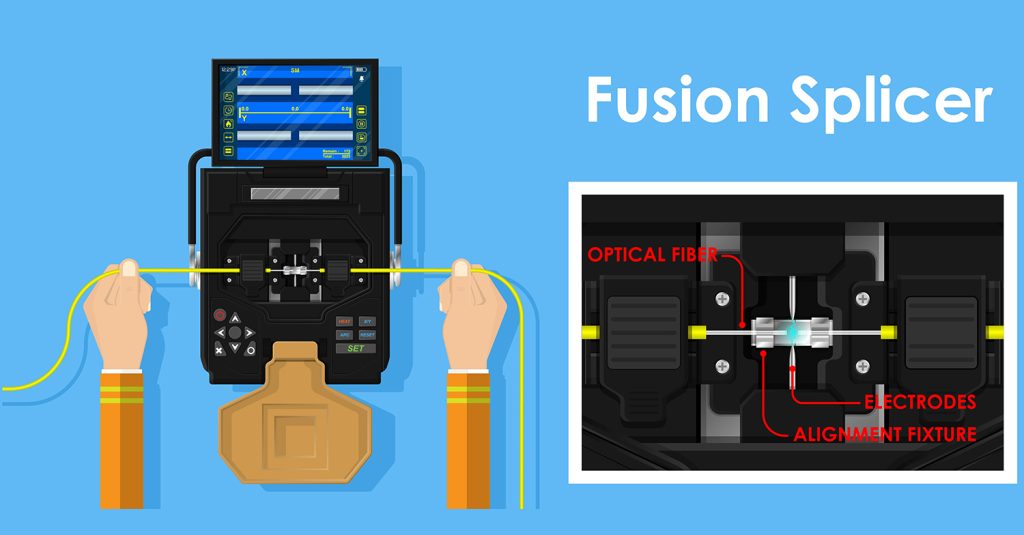
How to use the optical fusion splicer?
Optical fusion splicing is a crucial process in joining two fiber optic cables together with minimal signal loss. To ensure a successful splicing operation, you need to know which tools to use and how to follow the steps correctly.
Tools Required:
- Optical Fusion Splicer
- Fiber Cleaver
- Alcohol and Cleaning Wipes
- Fiber Strippers
- Fiber Optic Sleeves
Step-by-Step Instructions:
Step 1: Preparation
- Ensure that you have a clean and well-lit workspace.
- Before starting anything, be sure to slide the fiber optic sleeve through one end of the fiber optic cable. This only needs to be done once the perfusion cycle and will be utilized later on in the fusion splicing cycle. You also want to do this step first so that you will not be damaging your fiber optic cable later on.

Step 2: Fiber Preparation
- Strip the protective coating from the fiber optic cables using fiber strippers. Be careful not to damage the underlying fiber.
- Clean the exposed fiber ends with alcohol and cleaning wipes to remove any contaminants.


 Step 3: Fiber Cleaving
- Place the fiber optic cable in the fiber cleaver, aligning the cleaver blade with the fiber.
- Follow the manufacturer’s instructions to cleave the fiber. This will provide a clean and precise cut.
**Be sure to properly dispose of all glass shavings carefully.

Step 4: Fusion Splicing
- Open the optical fusion splicer and ensure that it is properly calibrated according to the manufacturer’s instructions.
- Place the prepared fiber ends into the splicer’s fiber holders, aligning them carefully.
- Close the fiber holders and initiate the fusion splicing process as directed by the splicer’s user interface.
- The splicer will align the fibers and apply heat to fuse them together. This process typically takes a few seconds.
- Once the fusion is complete, carefully remove the spliced fiber from the splicer.

Step 5: Protective Sleeve Installation
- Slide the fiber optic sleeve over the spliced area of the fiber. Make sure that there is an even amount on both sides as this will later ensure an even amount of strength!
- Use the heating element, following the manufacturer’s instructions, to shrink the sleeve and secure it in place.

Step 6: Testing and Inspection
- Use an optical power meter or an OTDR (Optical Time-Domain Reflectometer) to test the spliced fiber for signal loss and quality.
- Inspect the spliced area visually for any signs of damage or imperfections.
All Done!


